FIrst thing's first: WEIGHT. We must first determine how much weight our stand would bear.
Let's talk about a standard 35-gallon tank for instance (30" x 16" x 16"; actually it's just 33 gallons but what the heck?!). The weight of our tank is roughly 45 lbs.
Now for the water, for simplicity's sake, let's take the weight of a gallon of fresh water (since salt water's weight differs from density); 1 gallon of freshwater is roughly 8.35 lbs (slightly heavier for salt water). Take that number and multiply by 35 gallons and we get 292.25 lbs. Now add it to the weight of our tank and we get a little over 337 lbs.
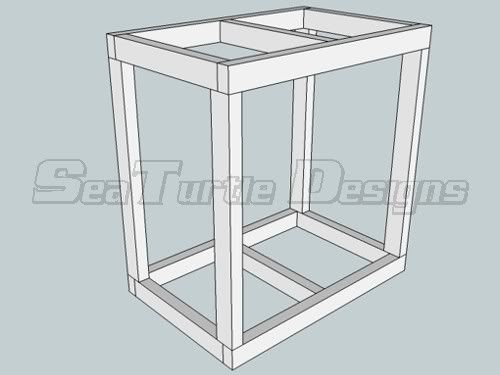
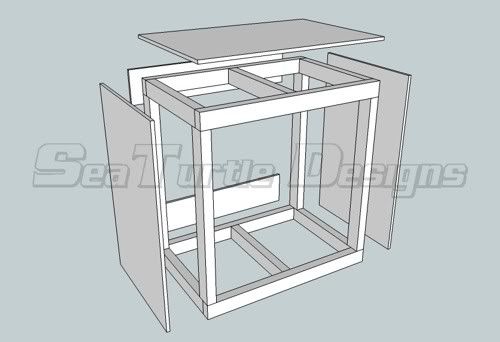
Since we're done with our load, we will now deal with our stand. For our tank, we will be using 2" x 3" kiln-dry, smooth 4 sides (kd s4s). The basic assembly will be like this:
Now, will it hold? Let's see... hardware-bought wood, unless specified, is usually tanguile/lauan wood and it is in the range of moderate strong wood which has a compressive strength (parallel to the grain) of about 400-450 psi.
Here's how to figure out if our stand will hold: let's get the area of the end faces of our wood first as this is going to be our contact area. Most often than not, a 2 x 3 kd s4s lumber is actually 1.5 x 2.5. So our area will be 3.75 sq in. Since our stand has 4 legs, we will multiply our area by 4 and get a total contact area of 15 sq inches. Let's bring in our compression rate off 400-450 psi. Let's take the lowest rate of 400psi and multiply it to 15 sq inches and we'll arrive at 6,000. This means that our stand can support 6,000 lbs of load. But since there are other factors (ie: unseen defects on the wood primarily) that needed to be taken into consideration, it would be better to have what we call a "safety factor." The margin that i use as a safety factor is 25% of the end product. So for our stand, let's take 25% of 6,000 and we'll get 1,500.
So, our stand can safely support a total load of 1,500 lbs after all...
**I got the computation from a while back and somehow i already forgot where. So credit is given to where it's due
How to build our stand right? The basic assembly of the joints should be like this:
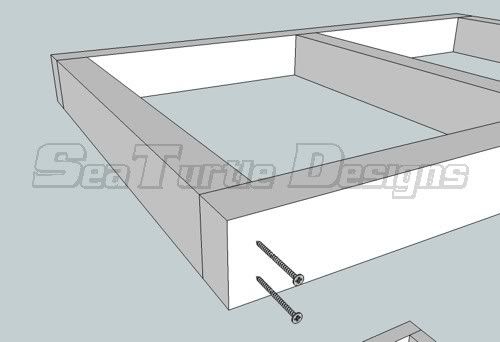
**all joints must be glued by wood glue (better if epoxy)
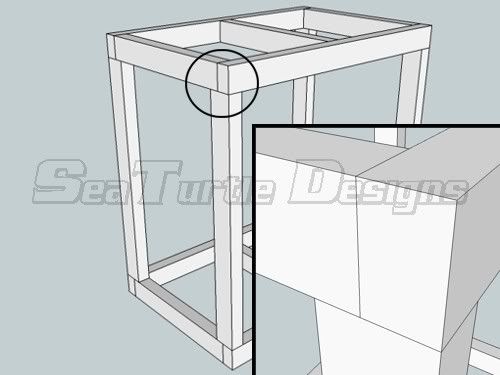
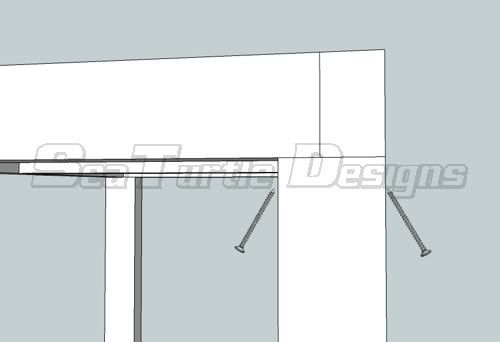
the joints could be assembled using 2" screws. like this:
pocket joints to the leg...
The assembly that we have is strong as the contact area is in full contact with the horizontal supports. But, it is still prone to swaying. That's why skinning the stand not only gives a pleasant appearance but also adds integrity to the stand.
NOTE: All screws should be counter sunk.
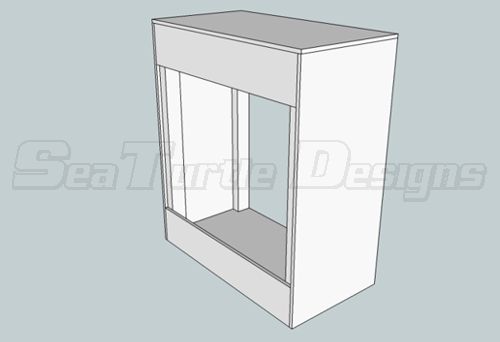
Let's get to skinning...
Basically, skinning is just wrapping our stand with wood panels. This, however, adds more stability to our stand as it will prevent the legs from swaying.
I would recommend using 1/2" plywood for the skin although you could also get away with 1/4". The only issue with using 1/4" is that, sometimes, the plywood is not that flat and "waves" will be visible once you're done painting the stand.
Skinning is the easiest part. Just cut out the needed panels and you're ready to go. Here's how it should look like:
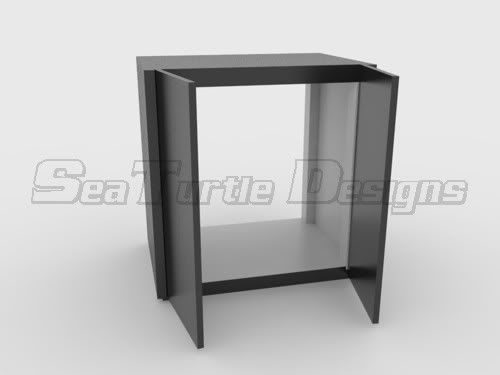
rear: since most hobbyist has a sump, the rear part is left with an open slot for air circulation

then...

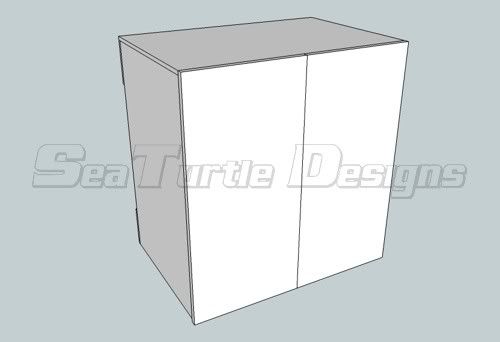
then install doors...

Onto painting...
Surface prep... this stage is very important as this will save you a lot of time and effort if done right. For someone who is new in this field, he will apply putty right after skinning as this seem to be the fastest way of getting things done. Or so it seems...
Plywood no matter how smooth it looks like has fibers exposed on it's surface. Applying putty won't conceal them and to make matters worse, sometimes there will be chemical residue on the wood that would compromise the quality of your paint. Not to mention the dust...
To save you from the trouble of applying-sanding-reapplying putty over and over again, it is best that you sand the surface first. A 120 or 150 grit sandpaper is what i would suggest (manual or with a sander). This would not only remove most of the exposed fibers but will also make the surface smoother for putty application. Plus, it would also help in removing chemical residue on the surface if there's any. The next step that I would do is, although this is optional, is to wipe the entire sanded surface with lacquer thinner. This also helps in eliminating possible chemical residue left on the surface and will leave your surface clean.
After all panels were already sanded and cleaned, now is the time to apply putty (both inside and out). Regular wood putty will do but I use epoxy putty. After the application, i usually wait 24 hours before sanding the entire stand (i use 120-360 grit; wet sanding).
After the stand has been sanded and wiped clean, it is now ready for priming. After which, it will be painted with the chosen paint for the finishing. One note though, enamel/lacquer paint is a good choice of paint for wood but for the interior, i always use epoxy paint or epoxy primer (at least 3 coats; not thinned) as salt water vapor is corrosive and may compromise your stand once it gets through the paint and into the wood.
Our finished product:
Hope this helps. Enjoy building!